close
Skip to content

Competencies covered

MSFFL3059: Install carpet tiles

Laying other tile shapes
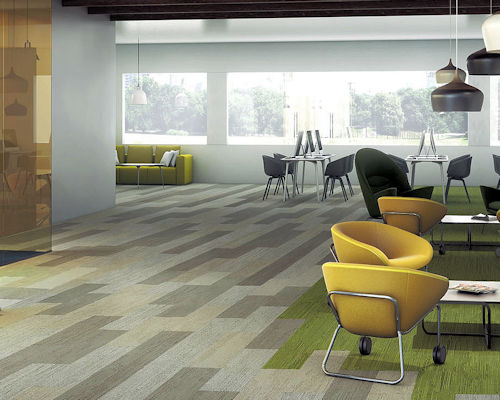

Image for slide 1
Audio for slide 1 (mp3 |6|KB)

Carpet tiles are manufactured in a range of shapes other than square, including:

  • rectangular

  • triangular

  • hexagonal.

The installation procedures are basically the same as for square tiles, but the layout patterns are different because of the changed proportions.

Set out below are the main patterns and laying sequences used in rectangular tile installations.

Note that in these examples there are now three chalk lines marked on the floor. The third line allows you to offset every second tile to achieve the different patterns.

hearing icon
Image for slide 2
Audio for slide 2 (mp3 |6|KB)

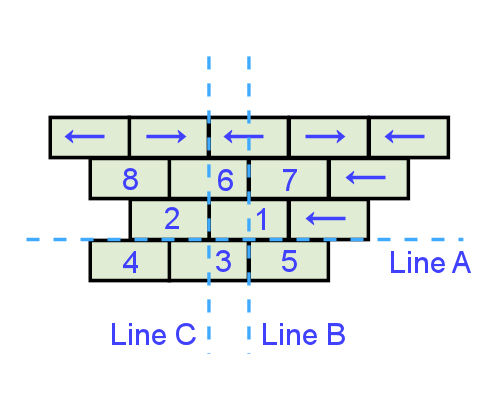
Brick

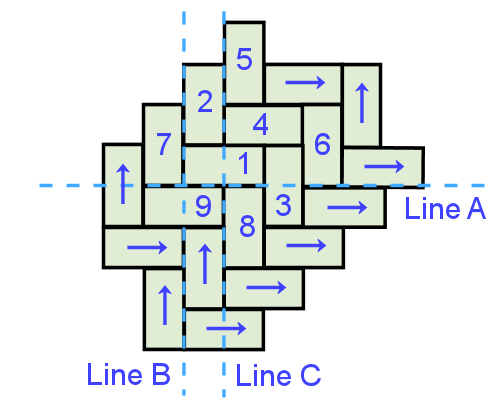
Start in one quadrant and lay the tiles in pairs, with the arrows facing each other, as shown in the diagram. Then allow the tiles to flow into the other quadrants.

Lay the tiles in the sequence shown in the diagram, starting either side of line B, at the intersection of lines A and B.

hearing icon
Image for slide 3
Audio for slide 3 (mp3 |6|KB)

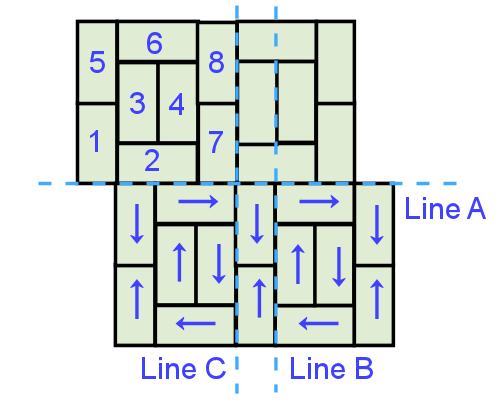
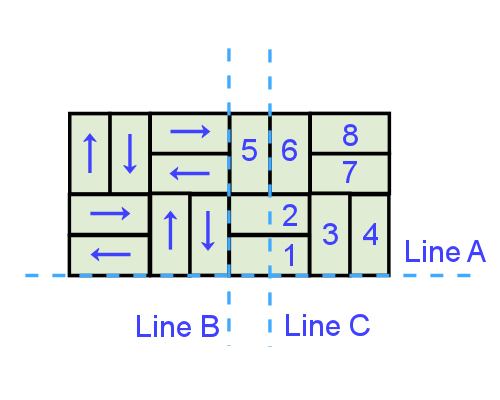
Boxed in

Start on either side of line B, where it intersects the lines A and B, as shown at right.

Note that this time, tile 1 is turned at right angles to tile 2, and that tiles 3 and 4 are boxed in by the tiles around them.

Allow the tiles to flow into the other quadrants as you work.

hearing icon
Image for slide 4
Audio for slide 4 (mp3 |6|KB)

Basket weave

Start at the intersection of lines A and B, with the first two tiles facing in opposite directions. Lay the tiles in pairs, with each pair turned at right angles to the other pair, and the arrows opposing each other.

hearing icon
Image for slide 5
Audio for slide 5 (mp3 |6|KB)

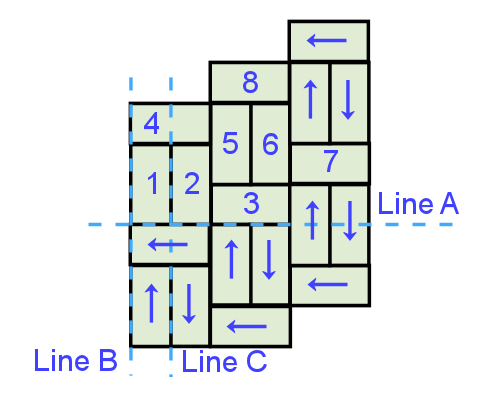
Half basket weave

Lay the tiles as you would for the full basket weave, but this time only place a single tile across the ends of the other pair. Work in columns as you form the half basket weave pattern.

hearing icon
Image for slide 6
Audio for slide 6 (mp3 |6|KB)

Herringbone

Start in one quadrant and build up the herringbone pattern by laying each successive tile at right angles to the previous one. Let the tiles flow into the opposite quadrant as you go.

hearing icon
Image for slide 7
Audio for slide 7 (mp3 |6|KB)

Other shapes

The rectangular patterns shown above are just some of the examples of different layouts that can be used with carpet tiles.

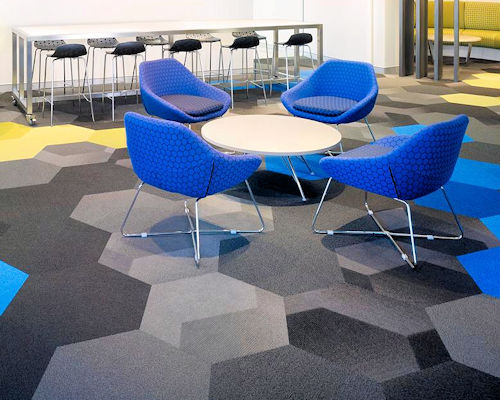
The range of patterns can be extended even further by triangular, hexagonal or non-symmetrical shapes.

The image at right shows a Shaw Contract hexagonal carpet tile floor.

hearing icon


Learning activity

Audio 8 (mp3 |6|KB)

The hyperlink below will take you to a Shaw Contract video clip showing the set-out and installation procedures for their hexagonal tiles:

Watch the video clip and then answer the following questions:

  1. How many chalk lines are used in the set-out?

  2. How are the 'LokDots' (pressure sensitive adhesive) applied?

  3. How many dots are required for each hexagonal tile?
hearing icon