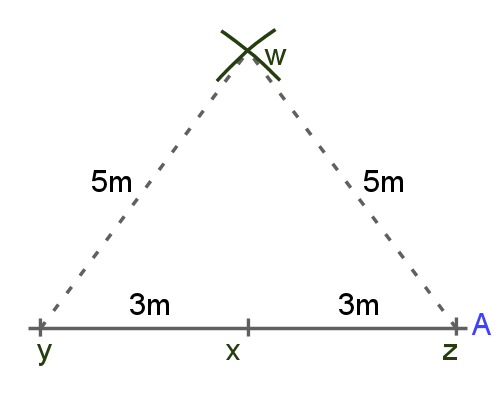
Setting out the working lines
 Audio for slide 1 (mp3 |6|KB)
Carpet tiles should be laid parallel to the longest wall in the room, unless you have made other arrangements with the client.
The starting point is generally near the centre, although this may vary depending on where the doorways are and whether there are partitions or other features that will need to be allowed for.
AS/NZS 2455 specifies that perimeter tiles should be at least one third of the full-tile width, and that doorways and high traffic areas should have full (uncut) tiles where possible.

 Audio for slide 6 (mp3 |6|KB)
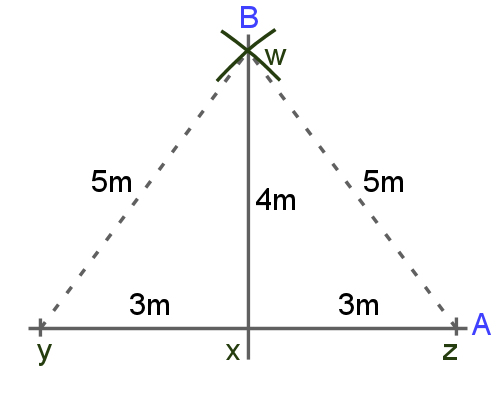
- Mark a chalk line between W and Z to achieve a line (B) at right angles to line A.
If you remember your geometry from the unit Making measurements, you will know that we have just used the '3, 4, 5 Rule', also known as Pythagoras's theorem.
This rule states that any triangle drawn in the proportions of 3, 4 and 5 will form a right angle between the two shorter sides.
In fact, as long as the proportions stay the same, you can use any measurements you like.

 Audio for slide 8 (mp3 |6|KB)
Elevator shaft
If you have an elevator in the centre of an area or other 'hollow square' that needs to be set out, use the following procedure:
- Mark out lines A and B.
Make sure that there is at least a full tile and one-third tile between the line and the internal wall.
Check that the two lines intersect at 90 degrees. - Mark out two more lines around the elevator shaft so that they are parallel with A and B.
- Lay the tiles in quadrants.

 Audio for slide 9 (mp3 |6|KB)
Office complex
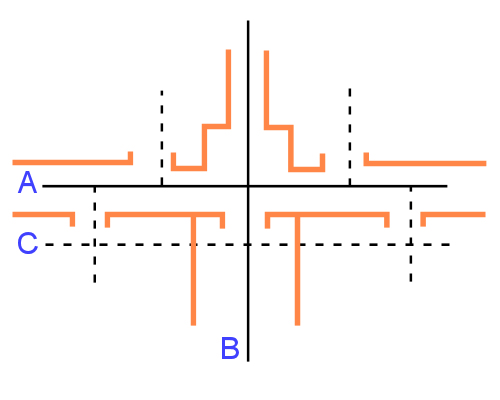
For an office complex with internal partition walls:
- Establish a crossover point and mark lines A and B. Check that they intersect at 90 degrees.
- Lay a row of tiles on either side of line A and stick them down.
- At the entrance to each office, mark a new line at right angles to A (shown here as dotted lines through doorways
Inside each room, you will need to establish another line at right angles (shown here as C). - Finish laying the tiles through the corridor, including the cutting along the walls.
- Lay the tiles into each office, building them up in a triangular pattern as you would for a single room.

 Audio for slide 10 (mp3 |6|KB)
Borders
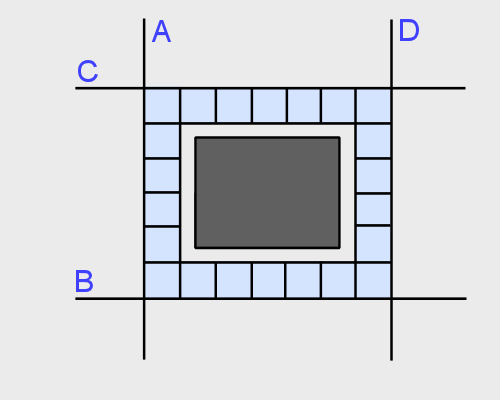
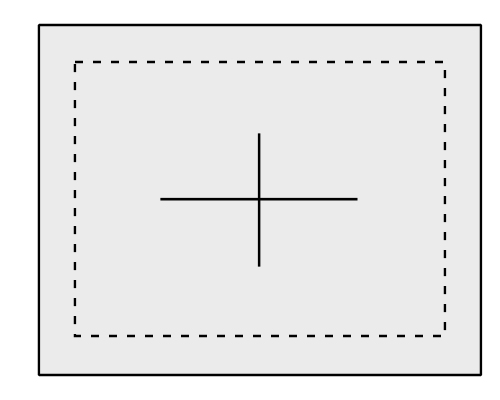
To set out for a perimeter border:
- Mark a chalk line around the perimeter the full width of the border. Check that the lines intersect at 90 degrees.
- Use the chalk lines as wall lines and cut the last row of 'field' tiles (in the body of the floor) to the chalk lines.
Again, try to ensure that these cut tiles are at least one-third the width of a full tile. - Lay the border tiles, cutting them around the walls to accommodate any irregularities.

 Audio for slide 11 (mp3 |6|KB)
Tile line lasers
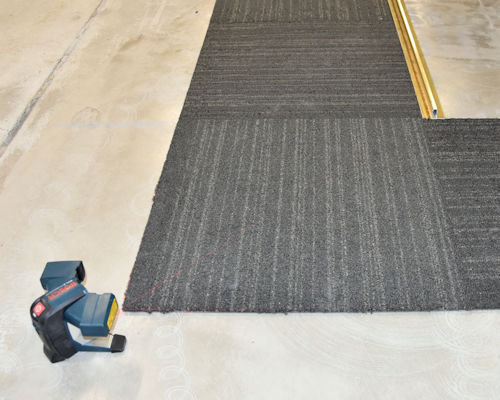
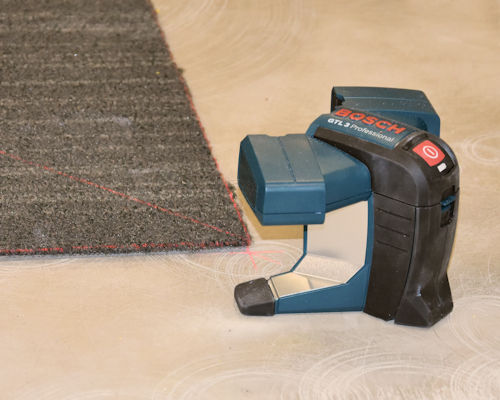
A tile line laser is a laser tool that projects working lines at 90 degrees onto the floor.
Some lasers, like the one shown at right, also project a line at 45 degrees.
These tools take the place of a chalk line, and are extremely accurate.
Just remember when you're using any laser tool to follow the safety precautions set out by the manufacturer.
In particular, don't look directly into the laser beam, and make sure no-one else, including pets, look into the beam.


Learning activity
Audio 12 (mp3 |6|KB)Your trainer will give you a room to measure up for a carpet tile installation. You will also be given a specific tile size to work with.
Your task is to produce a sketch showing the details set out below.
The sketch does not need to be drawn perfectly to scale. However, it should be well set out with straight lines and information that's clearly marked and easy to read. You may need to produce a rough version first and then re-draw it when you have worked out the details.
- Basic proportional sketch of the room, showing all measurements required to calculate and set out the working lines for the tiled floor.
- Extra information showing the following set-out details:
- chalk lines required to find the centre point of the room
- finished size of the cut border tiles against the perimeter walls
- lengths along the working lines between the walls and the starting point.


